Gacha Life 2 turns anime avatar creation into a fast scene-building playground. You can change a character’s hair, face, clothes, colors, and pose within minutes. Then, you can place that character inside a custom scene.
Lunime released the sequel in 2023. It builds on the original Gacha Life with deeper controls and more creative choices. The game feels like a dress-up game, character creator, and story tool together.
Create a new hero, design a funny group, or set up a dramatic scene. You do not need combat skills or fast reflexes. Start playing Gacha Life 2 free online now, then save your favorite designs for future stories.
What Makes Gacha Life 2 Different
From Dress-Up to Scene Building
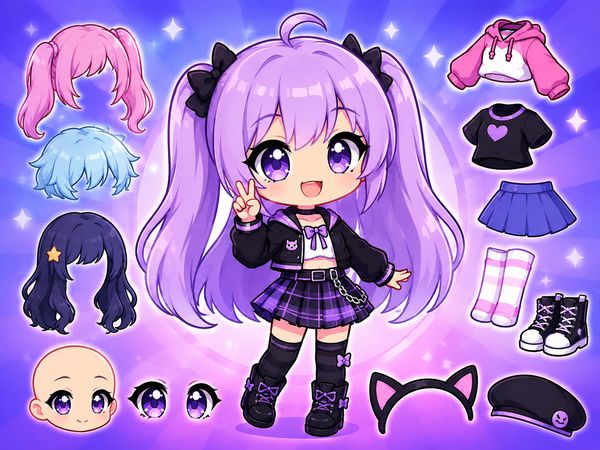
Gacha Life 2 focuses on anime avatar creation. You begin with a blank character and shape every major detail. Pick the body type, hair style, eyes, mouth, clothing, and accessories. Small changes can create a completely different personality.
The sequel belongs to Lunime’s larger Gacha series. It follows the original Gacha Life while giving creators more control. The main loop stays simple: build a character, place that character, and create a scene. Each step connects naturally with the next one.
Studio Mode makes that loop much bigger. This mode lets you place characters, backgrounds, and props together. You can arrange a school hallway, bedroom, park, shop, or fantasy setting. Add several characters, then adjust their positions until the scene feels right.
Studio Mode matters because it supports screenshots and story posts. It also works well for roleplay setups. One character might stand near a desk, while another waits by the door. A prop, pose, or background can explain what happens without extra words.
Try changing one part at a time when learning the game. Start with a character. Next, choose a background. Add a second character after that. This makes it easier to understand how Gacha Life 2 works without filling the screen too quickly.
New players often ask how to create scenes in Gacha Life 2. First, open the studio tools and choose your characters. Then, select a background and add useful props. Move each item into place, change poses, and test different expressions.
You can also use the scene as a tiny comic panel. Give one character a surprised face. Give another character a calm pose. The contrast makes the moment easier to understand. A simple setup often tells a better story than a crowded one.
Unlike a basic dress-up game, Gacha Life 2 does not stop after outfit selection. Your character becomes part of a larger picture. That extra step gives every design a reason to exist. You create characters for scenes, and scenes help show their personalities.
Why Players Return
Gacha Life 2 gives players many reasons to make another character. A new hairstyle can suggest a new role. A different color palette can turn a friendly hero into a serious rival. Even a small face change can alter the mood.
The creative loop also stays quick. You can test an outfit, change it, and compare both versions. You can make a matching group without repeating every choice from scratch. This speed helps players experiment instead of settling for the first design.
Players also return to build connected stories. One scene might show a character arriving at school. Another could show a secret meeting later. Life Mode adds character interactions, while Studio Mode helps stage the important moments.
There is no single correct style. Some players prefer bright fantasy characters. Others create casual students, performers, villains, or silly mascots. The tools support all those ideas without forcing one path.
Character Customization and Outfit Ideas
Hair, Colors, and Face Details
Character customization sits at the center of Gacha Life 2. You can change many appearance details before creating a scene. Hair shape, bangs, eyes, eyebrows, mouth, skin tone, and accessories all affect the final look.
Begin with the face because it sets the character’s mood. Large bright eyes may suit an excited hero. Narrow eyes can make a rival look focused. A tiny smile feels friendly, while a flat mouth suggests a serious personality.
Hair gives the character a strong outline. Choose a style that looks clear from a distance. Long hair can create a soft or magical shape. Short hair can make a character look sporty or neat. Add a front section that does not hide the eyes.
Color controls let you explore more than simple presets. Try changing the main hair color, highlights, eyes, and clothing separately. You can use two shades from the same color family for a calm design. Use one bright shade when you want a detail to stand out.
Do not change every color at once. Pick a main color first. Add a lighter or darker partner next. Finish with one accent color for clips, shoes, ribbons, or small props. This method keeps the character easy to recognize.
Face details work best when they match the role. A detective might use sharp eyes and a small frown. A cheerful baker could use round eyes and a wide smile. A sleepy character may need lowered eyes and a relaxed mouth.
Learning how to play Gacha Life 2 becomes easier when you test these parts separately. Make one face with three expressions. Keep the hair and outfit unchanged. Then compare the expressions inside Studio Mode.
Use the preview often. A design that looks great in the editor may look different beside other characters. Check the character against light and dark backgrounds. Strong contrast helps the face, hair, and clothes stay visible.
Accessories can finish a design, but too many can hide its main idea. Add glasses for a clever student. Choose a hat for a performer. Pick a bag, bow, or badge when the object supports the character’s role.
The best Gacha Life 2 characters usually have one clear feature. That feature might be bright hair, a special jacket, large glasses, or a memorable color pair. Give each character a visual clue that viewers can spot quickly.
Building Better Outfits
Choose a theme before selecting clothes. A beach outfit needs different pieces from a royal costume or school uniform. Starting with the theme prevents random items from fighting for attention.
Build from the largest piece first. Pick the shirt, dress, jacket, or uniform. Add bottoms or layers next. Finish with shoes and accessories that support the same idea.
Balance bright clothing with quieter pieces. A colorful jacket can work with plain trousers. A patterned skirt may need a simple top. Repeat one color in two places so the outfit feels connected.
Keep scene clarity in mind. Avoid giving every character the same hair and outfit colors. Clear differences help viewers follow conversations. They also make group screenshots easier to read.
When learning how to play Gacha Life 2, save a few outfit formulas. Try casual, formal, athletic, and fantasy sets. These starting points make future character designs much faster.
Life Mode and Social Storytelling
NPC Interaction
Life Mode gives Gacha Life 2 a second purpose beyond static dress-up. It supports character-based interactions and story-style play. Instead of only posing avatars, you can use them in small social scenes.
Think of each character as a person with a goal. One character may want help with homework. Another might hide a surprise gift. A third character could misunderstand the situation. These simple goals create movement in a story.
NPC interaction works best when every character has a clear role. Give one character a question to ask. Give another character an answer or problem. Add a third character only when that person changes the scene.
You can build a short conversation around a location. A classroom supports school stories. A kitchen suits family scenes. A park works for friendship moments. Match the setting with the characters’ actions.
Use expressions to show the mood without long explanations. A shocked face can reveal a surprise. An angry face can create conflict. A nervous expression may hint that someone knows a secret.
Small actions feel more believable than huge changes. Let a character greet someone, point toward an object, or step away from a group. These details make the scene easier to follow.
Life Mode is not a combat or level-grinding mode. It centers on interactions and personal stories. Your reward comes from making a scene that feels funny, warm, dramatic, or surprising.
Here are useful Gacha Life 2 tips for Life Mode. Start with two characters, not ten. Give them different personalities. Place them in a setting that explains their conversation. Then add another character if the story needs a twist.
You can also reuse one character in many roles. Change the outfit for a new day or event. Keep the face and hair similar so the character still feels familiar. This creates continuity across several scenes.
Making Simple Stories
Build stories around a beginning, middle, and ending. The beginning introduces the place and characters. The middle adds a problem, question, or surprise. The ending shows a choice, joke, discovery, or solution.
Keep the first story short. A few connected scenes work better than a giant plot. For example, a character loses a notebook, asks a friend for help, and finds it inside a prop-filled room.
Use Studio Mode for the visual moments. Use Life Mode for the interactions. Together, they let your avatars move from a simple design into a personality-driven story.
Write down each character’s goal before building the scene. That one sentence can guide the poses, expressions, and props. It also stops the story from becoming confusing.
Try Gacha Life 2 right here and turn your next character idea into a complete scene.
Tips for Better Gacha Life 2 Designs
Choose a Clear Theme
A clear theme makes every design decision easier. Choose a role, place, or mood before touching the outfit menu. Examples include a moonlit magician, a school athlete, a cheerful shop owner, or a quiet forest guide.
Match the outfit to the personality. A brave character might wear a strong jacket and boots. A shy character may prefer soft colors and comfortable layers. A serious leader could use clean shapes and fewer accessories.
Think about the character’s daily actions. A dancer needs room to move. A student may carry a bag or notebook. A fantasy hero could use a cape, special shoes, or a glowing color accent.
Use the same idea in the scene. Place an athlete near a field or gym-style background. Give a shop owner useful counter props. Put a magician near a dark background with a few bright details.
Repeated color palettes save time. Pick three colors for a team or family. Use the first color on large clothing pieces. Use the second for smaller details. Keep the third as an accent for eyes, shoes, or props.
Save that palette in your notes if needed. Then reuse it across several characters. Change each person’s main color so they look different. Shared colors can still make the group feel connected.
Pose choice matters as much as clothing. Match a confident pose with a bold personality. Use a smaller pose for a shy character. Avoid giving every character the same stance, especially in group scenes.
Expressions should fit the moment. A character cannot look surprised in every scene. Mix calm, happy, worried, angry, and curious faces. Small expression changes can make repeated outfits feel fresh.
Outfit ideas become stronger when you test them inside the final scene. A costume may look balanced alone but appear too bright beside another character. Move the characters together and check which design attracts attention first.
Pose codes may appear in player-made guides, but do not depend on unknown codes. Choose poses directly from the available controls. This keeps your designs clear and avoids using settings that may not match your version.
Try making three versions of one character. Keep the face the same. Change the clothing theme, color palette, and pose each time. Compare the versions to see which one tells the clearest story.
Use Color Balance
Start with one main color. Add one supporting shade next. Finish with a small accent. This simple order prevents the design from becoming too noisy.
Light backgrounds need darker clothes for contrast. Dark backgrounds need brighter details. Check the eyes and face first because viewers look there before accessories.
Repeat colors with purpose. Match a hair clip to the shoes. Match a jacket stripe to a prop. Small links make the whole scene feel planned.
These tips and tricks for Gacha Life 2 work best when you test them quickly. Change one color, preview the scene, and decide whether it helps. Fast testing beats guessing.
Gacha Life 2 Download, Platforms, and Free Access
Mobile and PC Releases
The Gacha Life 2 release date arrived in October 2023 for Android and iOS. That launch made the sequel available to mobile players through its official app listings. The Google Play listing provides the Android download route.
Gacha Life 2 Android play uses touch controls. Tap a menu item, choose a color, and preview the result. Gacha Life 2 iOS play follows the same basic idea through compatible Apple devices.
The game later reached PC. PC play gives you a larger screen for checking outfits, props, and scene spacing. It can also make detailed Studio Mode setups easier to inspect.
Always use a trusted official listing when downloading. Check the developer name before installing. The Gacha Life 2 developer is Lunime, the studio behind the Gacha series.
Players also enjoy free access because the core creative tools do not require a paid entry ticket. Availability may depend on the device and the official version you choose. Keep your download updated through the proper store or release source.
Some pages advertise modified versions as the best Gacha Life 2 mods. Treat those files carefully. Unofficial modifications may contain unsafe downloads or change the game without Lunime’s support. The safest choice remains the official release.
Is It Free?
Gacha Life 2 is known as a free download on supported mobile platforms. Check the store page before installing, since device requirements and optional purchases can change.
“Free” does not mean every unofficial file deserves trust. Avoid asking for passwords or installing strange packages. Use the official listing and keep control of your account and device.
Community interest in free online access continues because many players want quick creative sessions. If a browser version appears on this page, follow its own loading instructions and avoid extra downloads.
Controls, FAQ, and Common Player Questions
How You Interact With the Game
Gacha Life 2 uses menu-driven controls. Mouse clicks work on PC, while touch taps work on mobile devices. Select a category, choose an item, and preview the character before moving on.
Tap or click clothing options to change the outfit. Open color controls to adjust the main shade and smaller details. Use the pose and expression menus when the character needs a new mood.
Studio Mode follows the same easy pattern. Select a character, background, or prop. Place it in the scene, then adjust its position. Test the layout before saving your finished setup.
Life Mode focuses on selecting characters and starting interactions. Follow the available prompts and watch how the scene develops. Keep the number of characters small while learning the menus.
Players asking about a free online way to enjoy Gacha Life 2 should check the page’s loading options first. Browser play may use mouse taps, while downloaded versions use the controls from the installed app.
Use a larger screen when arranging many props. Use touch controls when making quick mobile edits. Both control styles support the same creative goals: design, place, pose, and tell a story.
Quick Answers for New Players
What platforms support the game? Gacha Life 2 launched on Android and iOS in October 2023. It later released on PC.
Who created it? Lunime is the Gacha Life 2 developer.
Is it suitable for children? Parents should check the store rating and review scenes with younger players. Creative tools are simple, but shared content may vary.
Do beginners need special controls? No. Use taps or mouse clicks to select outfits, colors, poses, characters, and props.
Can you use the original game too? Yes. Gacha Life remains a separate title, while Gacha Life 2 offers the newer character and scene tools.
Compare with Similar Games
| Game |
Why Similar |
| Gacha Life |
Same series and closest match for character creation, dress-up, and story-making gameplay. |
| Room clicker |
Covers the customization/building aspect of creating and arranging a personal space, which is the closest overlap among the listed games. |
| Paper animals io |
Offers creative, stylized character-related gameplay among the available options, making it one of the nearer thematic matches. |
🎯 Fun Facts About Gacha Life 2
- The game launched on mobile in October 2023.
- The Google Play listing confirms an official Android release.
✨ Key Features of Gacha Life 2
- Character customization
- Studio Mode
- Life Mode
- Anime avatars
- Outfit design
- Pose editing
How to Play Gacha Life 2
Step 1: Open the game and choose a mode
Start by entering Gacha Life 2 and looking at the main menu. Pick the mode you want first. Studio Mode is best for scenes. Life Mode is better for character interaction. This choice matters because each mode uses the same characters in a different way.
Step 2: Build your base character
Begin with the character creator. Choose the face, hair, clothes, and colors before adding details. Keep the first version simple. A clean base helps you see what still needs work, especially when you later test different outfits or poses.
Step 3: Match the outfit to the character
Do not mix random items without a plan. Give the character a clear theme, such as school, casual, fantasy, or idol style. Use colors that work together. One bright accent is often enough. Too many strong colors can make the design feel messy.
Step 4: Use poses and expressions with purpose
Pick poses that fit the story you want to show. A happy pose works for friendly scenes. A strong stance fits dramatic shots. Expressions should match the pose. If the face and body tell different stories, the scene feels confusing.
Step 5: Set up a scene in Studio Mode
Place characters where the viewer can read them clearly. Leave enough space around important characters. Add backgrounds and props only when they support the idea. A few useful objects are better than a crowded scene that hides the main focus.
Step 6: Test scene balance and readability
Look at the scene as a whole before saving it. Check whether the characters are too close, too small, or too hard to see. If one outfit blends into the background, change the color or move the character. Good readability makes the scene stronger.
Step 7: Use Life Mode for story ideas
Switch to Life Mode when you want more character-driven play. Use it to imagine how your avatar behaves, reacts, and talks. This helps you create better scenes later, because the character will feel like a real person instead of a random design.
Step 8: Refine and reuse your best designs
Save time by keeping the strongest outfit and color combinations. Reuse them for new characters with small changes. This is especially useful when making matching groups or fandom-inspired avatars. Small changes often create better results than rebuilding everything from zero.
Conclusion
Gacha Life 2 delivers a vibrant, creative experience where your imagination takes center stage. With expanded customization, expressive characters, stylish outfits, detailed scenes, and plenty of ways to tell your own stories, it offers far more than simple character design. Every choice helps shape a unique world that reflects your personality and creativity.
Whether you enjoy role-playing, creating dramatic scenes, designing memorable characters, or simply experimenting with endless looks, Gacha Life 2 makes it easy and entertaining to bring ideas to life. Its colorful visuals and flexible tools ensure there is always something new to discover. Start creating your next adventure today and play Gacha Life 2 right here on this page.

No comments yet. Be the first to share your thoughts!